 Putting the final touches of color on your new home is one of the most agonizing parts
of an entire project. One person's idea of satisfying color is another’s idea of bad taste. Every neighborhood has
at least one home painted a hair-raising hue of lime green or neon pink. Every time I drive by one of those homes, I
wonder what kind of people live there. Maybe those people really are normal I reassure myself, giving them
the benefit of the doubt. They just made an honest mistake too costly to fix. The two-square-inch color chip looked
fine on the glossy brochure; but when multiplied by a million on a two-story house, it was overbearing. Putting the final touches of color on your new home is one of the most agonizing parts
of an entire project. One person's idea of satisfying color is another’s idea of bad taste. Every neighborhood has
at least one home painted a hair-raising hue of lime green or neon pink. Every time I drive by one of those homes, I
wonder what kind of people live there. Maybe those people really are normal I reassure myself, giving them
the benefit of the doubt. They just made an honest mistake too costly to fix. The two-square-inch color chip looked
fine on the glossy brochure; but when multiplied by a million on a two-story house, it was overbearing.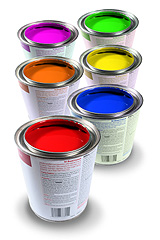 Selecting
colors and paints is tougher than most people think. Anticipating the complex interplay between light, paint type,
color and surface texture takes time and experience. We agonized for weeks over exterior and interior colors --
perhaps because we didn't want self-appointed critics to do as we had done: question the sanity of the people living
in the newly-painted house. To get ideas, we drove around exclusive neighborhoods noting homes we especially liked.
We knocked on doors, asked to see paint cans, and queried about preferred brands. If after persistent knocking no
one answered, we'd sneak around to sunny spots trying to match the wall and trim colors to our color palette
selector. Not even big mean guard dogs kept us from flashing color chips from the safety of our car window.
Since you will be making several trips back and forth to the paint store, choose a store that’s conveniently
located, but that also has reputation for quality products and good customer service. Depending on you or your painter's
preference, you can either select a brand first (based on reputation and quality) or select a color you like
irrespective of brand. Generally, it’s best to chose a brand first based on its reputation and availability in your area since almost any color can be
custom mixed. Once you find a brand you like, pick up some
paint chips and brochures. Some stores will even let you purchase complete color palettes for fifteen or twenty
dollars. Depending on the brand, your color selections may be limited to those that are premixed. The advantage of
premixed paints is the color consistency from can to can, making future touch-ups less painful. The disadvantage, of
course, is the limited color selection.
If you don't see premixed colors you like, don't be afraid to venture into custom color selections. Most paint
stores will custom mix just about any color you want. They usually offer a set of "standard" custom color formulas
coded by catchy names and numbers, like "Silk Snow, XM-1432-1" or "Rhubarb." Benjamin Moore, for example, offers
well over 1,600 "standard" custom colors with any variation in between. Some paint retailers, such as the Home
Depot*, offer computerized matching services to formulate a paint mixture that closely matches a color sample you
provide (such as a piece of fabric or an existing sample of paint). Even so, computerized matching isn't perfect, so
it's always best to mix a quart and test it on a sizable area before committing yourself to a whole room or
exterior.
 Selecting the right paint color or matching existing paint can be as elusive as an itch under your skin. Surface
texture, ambient lighting, paint type, method of application, and color all have a significant effect on the
apparent color. Even the surroundings can distort the true color due to reflections. I never would have guessed
that the white walls on our first home had several drops per gallon of black tint in the paint. When it came time to
repaint, we checked some old cans the owner had left us. Fortunately, we could still make out the formula scribbled
on the rusty lid. That's when we learned that white is not white. Selecting the right paint color or matching existing paint can be as elusive as an itch under your skin. Surface
texture, ambient lighting, paint type, method of application, and color all have a significant effect on the
apparent color. Even the surroundings can distort the true color due to reflections. I never would have guessed
that the white walls on our first home had several drops per gallon of black tint in the paint. When it came time to
repaint, we checked some old cans the owner had left us. Fortunately, we could still make out the formula scribbled
on the rusty lid. That's when we learned that white is not white.
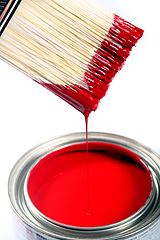
When matching paints, be certain you compare dry samples. Opening the lid of newly mixed paint will show you the
general color, but when dry the color will appear different. One technique is to spread some fresh paint on a white
chip available from the paint store. Then, use a hairdryer to dry the sample. This will show you a truer color. If
you like what you see, you’re ready to bring the paint home for a test on the wall.
The other consideration, particularly for indoor applications, is whether a bold color might lock you into a
limited color scheme. If this concerns you, paint the walls a neutral shade of white. For a warmer look, select an
off-white with a subtle brown or yellow tint. Typical tints used to create a wide range of attractive shades of
white include raw umber, yellow oxide, orange, red, and black. While color names vary from vendor to vendor, you'll
see a variety of whites called Soft White, Antique White, or Navajo White. Off whites are compatible with many
fabrics, posters, and decorations. If you prefer a cooler neutral look, find a white with a few drops per gallon of
black tint. This will tone down the glare of bright white walls and will contrast nicely with white trim in a satin
or semi-gloss finish.
If you prefer the soft look of pastels, your off-white selection may have a hint of umber and red tint to give a
slight peach coloring. A few drops of blue tint gives a cooler pacifying appearance. One friend of ours found a very
subtle baby-blue color they wanted to paint their bathroom. On the color sample, the blue seemed barely noticeable.
Upon painting all four walls in the bathroom, it was readily apparent that their baby blue appeared much more
intense than anticipated. While the end product still looked good, it was bold, not subtle. Other friends of ours
had a similar experience when their pastel peach selection made their living room look vivid pink. Depending on your
expectations, this might come as great disappointment. Invest a few dollars for quart containers of the paints
you're considering; then paint a section of the wall before committing to the final color. Paint a large enough area
and simulate typical lighting to determine whether the color you have selected is giving the desired effect. Is it
too bold? Just right? Or too subtle? Remember that by the time you finish painting all the interior walls and the
ceiling, whatever color you have selected is likely to appear intensified. A large amount of color perception,
however, occurs also by comparison between a known reference and the color. The opposite is true on neutral exterior
colors; that is, they can sometimes appear lighter than expected, particularly on sunny exposures.
If you don't want to risk painting (or destroying) an existing surface, here's a simple tip that has most of the
benefit without any of the risk. Buy a clean, smooth, 4'x8' piece of 3/8" plywood or ½" sheetrock. Crosscut it into
two four-by-four pieces. Most stores will make one cut free. This not only makes it easier to transport it back in
your car, but it'll give you two smooth surfaces on which to test some color samples. Prime the smooth side of each
piece with a good latex primer; let the primer dry thoroughly before proceeding. Pick up a few disposable plastic
paint tray liners, some inexpensive 9" rollers with a short to medium nap, and a hand roller (assuming you don't
already have one). For each wall color you're considering, roll on a full coat on each board. It's a good idea to
label the color on the back of each board to avoid confusion later. To eliminate any possible bleed-through of the
plywood and ensure a rich, full color, roll on a topcoat of paint once the first coat has dried fully. As the paint
dries it becomes flatter (less shiny). Compared to the wet state, the apparent color may change noticeably as it
dries. After you've completed your works of art, place them strategically against the wall. Stand back and observe
the effects under different lighting conditions and times of day. If you're happy, you've found your match. If,
however, you haven't yet achieved the right effect, buy some more samples and try them. It’s much cheaper to adjust
the color before you paint a whole room as opposed to after.
To experiment with window and trim colors, buy an eight-foot piece of pine molding or 1x4 stock. Cut it also into
exactly two four-foot lengths. Because trim often comes slightly oversized, you might have a few inches left over.
Glue and clamp each four-foot length of trim horizontally across the top of each plywood sample. It's best to do
this before painting the plywood. Sand lightly before priming. Give the trim piece a good prime coat. After it's
dry, sand lightly and finish it with two coats of satin or semi-gloss trim paint. Now you'll have a better idea of
the final look you'll achieve. You'll be surprised how different the colors look compared to the paint chips. We
tried a half dozen or more color combinations before committing to a final one. After all, what's a few quarts of
paint when you consider how many years you'll be looking at those walls once they're painted!
To help you with brand selection, magazines such as Consumer's Report provide good independent guidance based on
unbiased laboratory testing. After doing your research, ultimately you or your painter will select a brand based on
local availability, perceived reputation, price, color selection, and product selection. Some brands, such as Kelly
Moore, are available primarily in the Western states. Other brands such as Sears and Benjamin Moore are available
throughout North America. While many manufacturers make claims that their paints are superior, this information is
often misleading. Superior to what? Water colors? A number of interrelated factors influence the overall quality of
paint. Therefore, hyping one quality in isolation makes little sense. For example, if a paint has exceptional
durability, does that mean it's scrubbable or that it won't blister and peel? If a paint flows on like glass, what
does that say about its color and gloss retention when exposed to years of ultraviolet torture?
Unfortunately, there is no consistent standard against which paints must be tested, making direct comparisons
difficult at best. To my knowledge, no paint manufacturer has been able to simultaneously optimize all important
parameters. While research and development continues to provide re-formulations based on new synthetic resins,
progress is gradual. Because manufacturers constantly refine their products, this further complicates accurate
comparisons between brands. Like a fine wine, you almost need the vintage stamped on the can. I can see it now --
critics touting the '87 Benjamin Moore private reserve as a paint with exceptional smoothness and balance. A good
value for the money. But the '91 Brand X, give it time! It just doesn't have the rich body and smooth finish you’ve
come to expect.
In some ways, certain current paints may actually perform worse than the products they replace. This is
because of increased concern and legislature over the high levels of volatile organic compounds (VOC's) many paints
release into the atmosphere. California leads the country in tough legislation, making it all but cost prohibitive
to use oil-based paints on a large scale. VOC-rich paints -- such as the oil-based paints available just a few years
ago -- are known for their durable shell, high glossiness, and good wear resistance. By restricting the levels of
solvents contained in their paints, manufacturers have had to make compromises. Many painters swear that the new
paints just don't last like the old ones; nor do they look as good. This is known as the great oil crises of the
1990's. Will the good old days of "Oil or latex, ma'am" be gone forever?
The Great Oil vs. Latex Debate
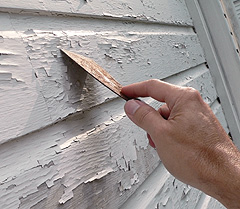
As the debate over oil vs. latex rages on, it's easy to overlook why most paints fail in the first place: poor
surface preparation. It’s critical to ensure proper moisture protection and good adhesion to the old surface (in the
case of remodeling). Most paint failures aren't the fault of the paint; rather, they're the fault of the painter.
Many do-it-yourselfers (and untrained painters) skip important surface preparation in their rush to get on with the
job. Yet, poor preparation invariably shortens the life of the paint job, costing more in the long run. While a
cheap paint has its own set of problems, that's never a good way to save money. Skimping on surface preparation
always costs more in the long run, because repainting will be more frequent. Because the paint itself is usually
less than ten percent of the cost of a paint job; saving money on cheap paint is a fallacy.
Before the advent of water-based latex enamels, paints were made from combinations of resins and oils, such as
tung or linseed oil. Over the years, the development of superior synthetic resins called Alkyds replaced true
oil-based paints. While alkyds are still referred to as oil paints, it's technically not correct. But old habits
never die. Even painters and paint stores still do it, so it's socially acceptable.
Alkyd paints have been used extensively on exterior trim and woodwork to provide a tough, smooth, and durable
finish. However, since alkyds generally contain hydrocarbon-based solvents that have been
associated with global warming and pollution, these paints are finding restricted use in a growing number of
states with stringent environmental protection laws. To limit the diffusion of these harmful solvents into the
atmosphere, some states limit the availability of alkyd paints to quart-size containers, making their widespread use
cost prohibitive and cumbersome in many cases.
For exterior application, a number of high-performance acrylic latex enamels are now available that provide
excellent service, including good color and gloss retention, and improved flexibility compared to alkyds. Because
acrylic latex paints use a water-based carrier, evaporation of the water poses no threat to the environment.
Nonetheless, latex paints still contain some amounts of potentially damaging additives, such as fungicides,
anti-blocking agents (to help avoid stickiness), among others.
While there is no perfect paint, the debate over oil vs. latex rages on. Ask ten painters their opinion and
you'll get twenty passionate responses. Few painters themselves have ever run controlled scientific experiments and,
consequently, are not necessarily objective in their opinions despite their best intentions. Many painters favor a
paint that's easy to apply or easy to clean up in lieu of paint that might wear well but is more labor intensive. In
this regard, there's no substitute for doing a little homework yourself before committing to a particular brand or
type of paint. Furthermore, because paint formulations are constantly undergoing changes and incremental
improvements, there may well be little current objective or scientific data comparing one paint to another. It's
like shooting a moving target.
Despite the moving target phenomenon, there are some general rules of thumb to consider when comparing alkyds and
latex paints. To help compare paints, the eighth edition of the Architectural Graphic Standards lists nine points to
which I add seven other considerations. These are as follows:
- Flow for ease of application
- Leveling for smooth appearance with minimal brush strokes
- Film thickness for required protection and hiding ability
- Drying time for efficient re-coating and minimization of particulate attraction
- Permeability for breatheability and moisture protection
- Wetting
- Adhesion for good bonding to subsurface
- Flexibility to avoid cracking and blistering when exposed to extreme sunlight, cold, moisture, and other
environmental abuse.
- Durability for good abrasion, impact resistance, scrubbable
- Color retention for true, lasting color appearance (particularly for darker colors)
- Gloss retention for continued luster
- Blocking to minimize propensity to stick to other objects (such as doors and windows against their jambs)
- Toxicity (should be minimized to avoid health risks, such as high mercury content, presence of fungicides,
etc.)
- Environmental effects
- Clean-up (water vs. mineral spirits or thinner)
- Price and availability
Paints are made from pigments, binders, a vehicle, and additives. Pigments provide color and opacity and influence achievable gloss, flow, and hiding
properties of the paint. Binders may be either synthetic or natural. Binders impart adhesion to the painted surface
and influence properties such as glossiness, flexibility, and wear. The vehicle or carrier is generally solvent based or water based.
Solvent-based vehicles contain dissolved pigments and binders that oxidize as the solvent evaporates. Water-based
vehicles, conversely, suspend acrylic latex molecules, which provide a less dense, but more breathable finish. Finally, specialty paint additives can affect
the flow, drying time, surface texture, and fungus resistance. Two-part epoxy-based paints also exist that result in an industrial-strength finish that's
chemically cross-linked to provide superior surface wear. Epoxy primers and paints are preferred for demanding situations such as garage or workshop floors,
or in powder-coated finishes common on appliances, fixtures, and other corrosion-prone metals.
When painting over new wood surfaces, the surface should be free of moisture, grease, and dust. To
seal the wood from excessive moisture penetration, prime the wood prior to the application of paint coats. For best
results, use an alkyd primer after all nail holes have been patched and sanded. This will seal the wood. If you're
priming over redwood or cedar, use special stain-lock oil-based primers to prevent tannic acid and other natural
oils from spoiling the surface with unsightly stains. For best protection, back-prime these woods to lock out
moisture to the largest extent possible. Areas such as fascia boards, garage-door jambs, and wall siding are good
candidates for back-priming.
Depending on the wood and the quality of the primer, a second coat of primer can be applied after a light sanding
and dusting of the surface. Since alkyd primers are solvent based, the surface must be thoroughly dry prior to
application. Any residual moisture on or inside the wood may cause poor adhesion or peeling later on, leading to
costly repairs.
Once the prime coat has thoroughly dried the wood or trim is now ready for a coat of paint, either acrylic latex
or alkyd. In general, for exterior applications, I recommend the use of an acrylic latex topcoat. Because of the
flexibility of latex and the ease of application, it’s likely to stand up well as the wood expands and contracts
with changes in temperature and humidity. Alkyds, on the other hand, may tend to crack and blister after extended
exposure to the elements. While no paint is impervious to environmental and ultraviolet exposure, premium grade
acrylic latex should provide years of durable service. I contacted the corporate headquarters of Kelly Moore in San
Carlos, California to discuss the great oil vs. latex debate. The executive with whom I spoke had been in the paint
business for over 25 years. He was an "oil" man all the way. But, when he said he had just repainted his home with
latex inside and out, he admitted privately that the days of oils were numbered. Despite a few drawbacks, the new
latex paints, he said, provide excellent all-around performance. So far, he's been extremely pleased with his
decision.
Satin or semi-gloss acrylic latex paints also perform well on properly primed stucco, masonry, and metal. Rain
gutters, for example, are generally fabricated from galvanized steel, aluminum, or copper in areas exposed to more
corrosive air. Special primers are available for these metals to ensure good adhesion with acrylic latex paints.
Because sheet metal contains residual oils from the manufacturing process, in addition to flux residues from
soldering joints and seams, a thorough cleaning with a white vinegar solution is a good practice to ensure that the
surface is free from adhesion inhibitors. Bonderized sheet metal supposedly doesn't have residual oils, but by the
time they're ready to paint, they're so dirty from the other trades that a good wipe down prior to priming is time
well spent. If you don't do this yourself, be sure this critical step is specified in your painting contract,
otherwise your painter might inadvertently overlook it. The painter we hired to do our job inside and out is one of
the most meticulous subcontractors we dealt with on the entire project.
Another benefit of using latex on porous surfaces such as stucco, for example, is that the latex paints allow
migration of microscopic particles of trapped water vapor that may be emanating from inside the house, such as
caused from hot showers, laundry, and overall evaporation. By allowing this water vapor to escape, the possibility
of condensation building up between the wall and the stucco is minimized.
If your windows are new and have wood exteriors, acrylic latex paints also make a durable coating. The one
caveat, however, is areas of the window that make possible come into contact with weather-stripping or other wood
parts. This is because latex has generally worse blocking properties compared to the harder finishes achieved with
alkyds. Blocking is the term to describe how much an object sticks to itself. For this reason, many painters may use
alkyd paints on these parts, including the interior for a more refined look. Latex paints have the disadvantage in
that they are not self-leveling paints, which means that brush marks may be slightly visible unless it is sprayed.
Alkyds, on the other hand, oxidize into a beautiful gloss finish that is extremely moisture resistant and tough. The
biggest drawback of using alkyds for interior use, however, is that they tend to yellow with time. Only when exposed
to the bleaching effects of direct or intense reflected sunlight do alkyds avoid yellowing.
In the Western US, Kelly Moore paints are popular due to their reputation for good quality and local formulations
optimized for Western climates. In our case, we used a #247 Chem-Guard primer over the bare stucco to prepare the
surface for the paint coat. The Chem-Guard primer is especially good for new stucco since alkalinity leaches from
the stucco as it cures. In general, it's best to wait at least 30 days before painting new stucco. While the primer
and paint tend to seal many of the hairline cracks that inevitably develop in new stucco, a better product is # Kel-Patch. A smooth version of Kel-Patch is available for smooth stucco (hard-trowel) finishes. After a thorough
application of Kel-Patch and latex primer have been made, we applied two coats of #1240 Acry-Shield Acrylic Latex
flat paint. The combined system provides years of trouble-free protection with excellent color retention.
Our Pella wood windows came pre-primed from the factory with a very thin coat of latex primer. After spackling
all nail holes and repairing any damaged surfaces, the entire window frame and sash were touch sanded and were
re-primed with alkyd primer to provide a good moisture seal. Exposed exterior surfaces were then painted with two
coats of #1250 Acry-Luster Semi Gloss Acrylic Latex. Alternatively, a #1245 Low Sheen paint is available that works
equally well on stucco and wood surfaces, depending on the look you're after. The Semi-Gloss seemed to cover better
and gave a richer finish that looked first rate.
When to Paint
 Unless you like your painting project to drag on forever, don't paint in the winter. We made a big mistake
attempting to paint the exterior of our home in December. Given the six-year California drought and the mild
temperatures compared to other parts of the world, I never expected it would take over three months to get the job
done. For best results, outside ambient and surface temperatures must be 50 degrees or higher. Otherwise, the paint
takes too long to dry, possibly resulting in a streaky appearance. Given that the wall surfaces didn't warm up to 50
degrees until mid-morning, and that the evening dew would begin to set in shortly after sundown, this left our
painters with only a few hours each day to get the job done. Considering the tedious cleanup usually required, it
seemed hardly worthwhile to break out the rollers only to pack them up again shortly thereafter. Throw in lunchtime
along with the world-famous punctuality of some painters, we were lucky to see a downspout primed before the
workmen headed home. Unless you like your painting project to drag on forever, don't paint in the winter. We made a big mistake
attempting to paint the exterior of our home in December. Given the six-year California drought and the mild
temperatures compared to other parts of the world, I never expected it would take over three months to get the job
done. For best results, outside ambient and surface temperatures must be 50 degrees or higher. Otherwise, the paint
takes too long to dry, possibly resulting in a streaky appearance. Given that the wall surfaces didn't warm up to 50
degrees until mid-morning, and that the evening dew would begin to set in shortly after sundown, this left our
painters with only a few hours each day to get the job done. Considering the tedious cleanup usually required, it
seemed hardly worthwhile to break out the rollers only to pack them up again shortly thereafter. Throw in lunchtime
along with the world-famous punctuality of some painters, we were lucky to see a downspout primed before the
workmen headed home.
As the job stretched out from December into February, the rains began to hit California, resulting in some of the
worst flooding of the century. Unsettled weather coupled with the 50% hit rate of local forecasts made February a
bust as far as painting went. The few dry days we had came on Sundays or holidays. Naturally, there were no painters
in sight for miles around. It wasn't until the end of March that the painters finished the job.
Whether you paint in the winter depends entirely on where you live, your painter, and a little good luck. Many
parts of the country rarely warm up past fifty during the winter, making exterior painting a near impossibility. On the other
hand, if you live in Arizona, the winter may be a better time to paint, as temperatures are mild compared to the
100-degree-plus temperatures of the summer. Painting in weather that's too hot can also have disastrous effects,
possibly causing the paint to cure prematurely and shortening the life of the paint job. Manufacturers generally
recommend painting when the ambient temperature is somewhere between 50 and 70 degrees Fahrenheit.
If you're painting the inside of your home, so long as you keep the indoor temperature within the recommended range you can paint whenever is convenient.
Since most paints outgas as they dry, it's always important to
paint in a thoroughly ventilated area. If this means keeping windows wide open, so be it. If there's a blizzard
outside and the wind-chill factor is minus twenty, you may be tempted to keep the windows shut. In this case, save
the painting for period of more mild temperatures when you can leave the windows open around the clock -- or at
least until any noticeable odors have dissipated. While the smell of fresh paint doesn't bother many people, more
sensitive people should avoid living in freshly-painted quarters altogether. Since latex paint has a water-based
carrier with typically low VOCs, its odor is significantly less bothersome.
Full Spectrum Paint
 A recent fashion trend in color selection and mixing is towards "full-spectrum" paints. As their name suggests,
full-spectrum paints are custom formulated from a careful blend of the three primary and three secondary colors to
produce colors that reflect the entire color spectrum. The primaries are red, yellow, and blue. The secondaries
(color complements) are green, violet, and orange, respectively. Why use full-spectrum colors? If you look at most
commercially mixed paints, they use a lot of earth tints like raw umber, raw sienna, yellow oxide, and red oxide.
These tints, while providing excellent pigment with good hiding power, are quite monochromatic in their color
spectrum. They are easy and economical to mix commercially, which is why most premixed and custom-mixed colors
contain typically no more three blends of tints. As a result, when reflecting light, their appearance is often
muted, dull, and lifeless. A recent fashion trend in color selection and mixing is towards "full-spectrum" paints. As their name suggests,
full-spectrum paints are custom formulated from a careful blend of the three primary and three secondary colors to
produce colors that reflect the entire color spectrum. The primaries are red, yellow, and blue. The secondaries
(color complements) are green, violet, and orange, respectively. Why use full-spectrum colors? If you look at most
commercially mixed paints, they use a lot of earth tints like raw umber, raw sienna, yellow oxide, and red oxide.
These tints, while providing excellent pigment with good hiding power, are quite monochromatic in their color
spectrum. They are easy and economical to mix commercially, which is why most premixed and custom-mixed colors
contain typically no more three blends of tints. As a result, when reflecting light, their appearance is often
muted, dull, and lifeless.
Conversely, full-spectrum paints contain "all the colors" of white light – similar to sunlight. Full-spectrum
paints more closely mimic naturally occurring materials with infinite color variation like stone, rock, and water.
Since it is possible to produce nearly any color by adjusting the proportions of the primary and secondary colors,
this gives finicky homeowners and decorators endless ways to mix just the right color.
Matching full-spectrum paints is very difficult. If going down this route, you will have to find a colorist or
paint expert who is intimately familiar with this subject. Not surprisingly, most painters will have no idea what
you’re referring to when asked about full-spectrum colors. To better educate yourself, an excellent book can get you
started. Color: Natural
Palettes for Painted Rooms is a wonderful introduction to this topic, complete with beautiful photographs and
discussion of color selection. The appendix even gives some examples on how to mix your own full-spectrum colors.
While this topic is fascinating, it can be frustrating for the novice to mix full-spectrum paints to achieve the
right effect. But it can also be rewarding once you begin to see how the different colors interact to produce a
range of colors that are truly breathtaking and rich. The key part of this is meticulous note-keeping so that
formulas can be reproduced if you stumble onto a combination that suits your fancy.
To help you get started, the following chart outlines formulations for various shades of neutral gray and beige.
The formulations are based on 1/48th of an ounce per increment. Note that some paint stores use 1/32nd ounce or
1/64th ounce increments. Formulations must be scaled accordingly. These formulas were mixed and tested using a high
quality interior flat acrylic latex, such as Kelly Moore 550-121 white tint base. Expect variations between
manufacturers since tints vary. Colors range from warm gray to beige, with increasing density of yellow tint.
Builders Websource color designators (BW-1001 through BW-1004) are provided for reference. Due to wide variations of
computer monitors, no attempt is made to recreate the resultant mixed colors.
Full-Spectrum Paint Formulations (Interior)
|
| All formulas are for 1 gallon. |
Hansa
Yellow |
Orange |
Exterior
Red |
Violet |
Thalo Blue |
Thalo Green |
Approximate
Tint Color |
|
|
|
|
|
|
Kelly Moore
Tint Designator
Universal Colorant
(Base paint is 550-121 white) |
A |
G |
R |
J |
E |
D |
| Warm Grey (BW-1001) |
27 |
7.5 |
9 |
4.5 |
6 |
0.5 |
| Cool Beige (BW-1002) |
40 |
14 |
12 |
4 |
6 |
None |
| Warm Beige (BW-1003) |
60 |
14 |
12 |
4 |
6 |
None |
| Yellowish-Beige (BW-1004) |
84 |
13.5 |
12 |
4.5 |
4.5 |
0.5 |
| All formulas are based on 1/48 Oz per increment. Note that some paint stores use 1/32 Oz
increments. If using 1/32 Oz increments, above formulas should multiplied by 0.67 and rounded to the nearest 0.5
increment. Note that Thalo Green is a very powerful color and should be used in scarce amounts, in no case more
than 0.5 increment unless a distinctly green hue is desired. Tints vary from manufacturer to manufacterer. The
above formulas are guidelines only. Adjustments may be required to achieve the desired formulation. |
Consider turning to full-spectrum colors when you’re prepared to make additional investment in your color scheme
and when you just can’t seem to find the "right" color to go along with your interior plan. Used selectively,
full-spectrum paints will liven up your rooms and enhance the apparent quality of the lighting, even when using
incandescent lighting sources. To keep track of which colors you use on each surface and when each room was painted,
consider putting together your own paint schedule, such as the one shown
here. |