|
|
|
|
Home Page | Books | BuildersTALK | Building a Dream | Green Building | Links | Software | Tech Notes | Tools | Contact |
|
|
|
|
|
Home Page | Books | BuildersTALK | Building a Dream | Green Building | Links | Software | Tech Notes | Tools | Contact |
|
 |
Messages and Online Forum Q&A
|
|
||||||||||||||||||||||||||||||||||||||||||||||||||||||||||||||||||||||||||||
|
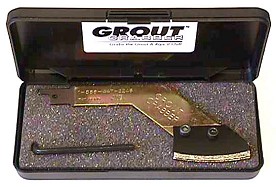
Re: Replacing Granite Floor TilesFrom: info@builderswebsource.com CommentsRemoving portions of an existing tile floor takes patience and care. Here are
some tips to help you minimize damage to your existing ceramic tiles, while your
remove the 3x3 granite squares that are too high: 1) First, use a hand grout saw or GROUT GRABBER attachment (photo courtesy GROUT GRABBER COMPANY) on an electric reciprocating saw to carefully remove the grout from the perimeter of the tiles you wish to replace. This helps to minimize stress on adjacent tiles when you go to remove the small granite pieces. Order plenty of extra blades, you'll need them! The professional version shown here offers diamond-coated blades, which outlast the lower-cost carbide versions. Each blade is approximately 1/16" thick. Depending on the grout width, you'll need to sandwich enough blades together to achieve the desired thickness. The Grout Grabber can remove both sanded and unsanded grout. 2) Next, use a 1/4" masonry drill bit to score a perforated diagonal line across each piece of granite tile you wish to remove. Be careful not to damage adjacent tiles. 3) Using a cold chisel and hammer, lightly punch through the perforations until you have a full diagonal split. 4) Use a small flat bar to pry up the loose tile shards, scraping the void clean as you go. 5) To avoid damage to adjacent tiles, protect the area with cardboard and vacuum after you remove each piece. This will keep your area clear of sharp remnants and dust. Be sure to wear safety goggles and a respirator. The fine grout dust can be irritating to your throat and sinus. 6) Once all the pieces are removed, use a latex-modified thinset mortar to install the new tiles. Let dry thoroughly (at least 24 hours) before regrouting. If you're having trouble matching the grout, take a sample into a tile store. Or, you may have to remove the grout everywhere, and redo the grout to achieve a consistent color, especially if the surrounding grout is stained from years of wear. We always recommend using a latex-modified grout or latex additive to achieve superior bonding, crack and stain resistance. Above all, be patient and don't get frustrated if the process seems slow and laborious -- it is! Builders Websource
|
|
||||||||||||||||||||||||||||||||||||||||||||||||||||||||||||||||||||||||||||
| About Us | Advertise | Newsletter | Privacy Policy | Terms of Use | |
 |
|