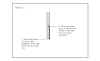
Builders Toolbox
|
 |
"...the one tool every builder needs..." |
Operating Instructions
|
Step 1: Remove cap & plug
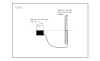
click to enlarge
Step 2: Remove air bubbles (if needed)
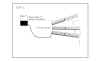
click to enlarge
Step 3: Place jug (part 1)
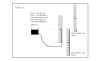
click to enlarge
Step 4: Place jug (part 2)
click to enlarge
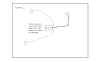
Step 5: Set reference point
click to enlarge
Step 6: Place & measure
click to enlarge
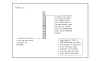
Instructions:
There are three basic uses for the WatrLevel; determine level, determine
out-of-level, determine slope. Your WatrLevel will work better if you add a
small amount of dishwashing soap to the water and food coloring. Allow the
water to run through the tubing until all air bubbles are out. Also, if the
WatrLevel is not used for some time, reset the stick to your original
reference point before using (air bubbles can form).
- DETERMINE LEVEL. Pick a reference point, this is the point where
you’ll be leveling to. Place water jug such that the water level in the
water jug is within the range of the measuring staff and the tubing will
reach all areas you want leveled. Place the measuring staff next to (or
on) the reference point (the point you want to level to) and move the knob
until the zero matches the water level in the tube. Measure above or below
the zero to the reference point and note the number (for example: 4 inches
in the black). Take the measuring staff to the next point to be leveled,
and match the zero to the water in the tube, measure to your reference
point (in this case 4" in the black) and mark. This point is exactly level
with the reference point.
- DETERMINE OUT-OF-LEVEL. Pick a reference point, this is the point
you’ll be comparing to. Place the water jug such that the water level in
the water jug is within the range of the measuring staff and the tubing
will reach all areas you want to check. Place the measuring staff next to
(or on) the reference point (the point you want to check against) and move
the knob until the zero matches the water level in the tube. Take the
measuring staff to the next point to be checked and simply read the
numerical value that corresponds to the level of the water in the tube.
Readings in the red indicate that this spot is below your reference point,
black indicates above.
- DETERMINE SLOPE. Same as Determining level except you mark down (or
up) according to how much slope you want. One-quarter inch per foot would
mean that ten feet from your reference point you will mark 2.5" below your
reference point (zero).
- Remember, once the water jug has been set do not move it! If you do,
your original reference point will be lost.
|
Click HERE to learn more about the
patent-pending
WatrLevel |